Let’s create a foundation by using the "Concrete column"
Enable the tool and create an arbitrary column.

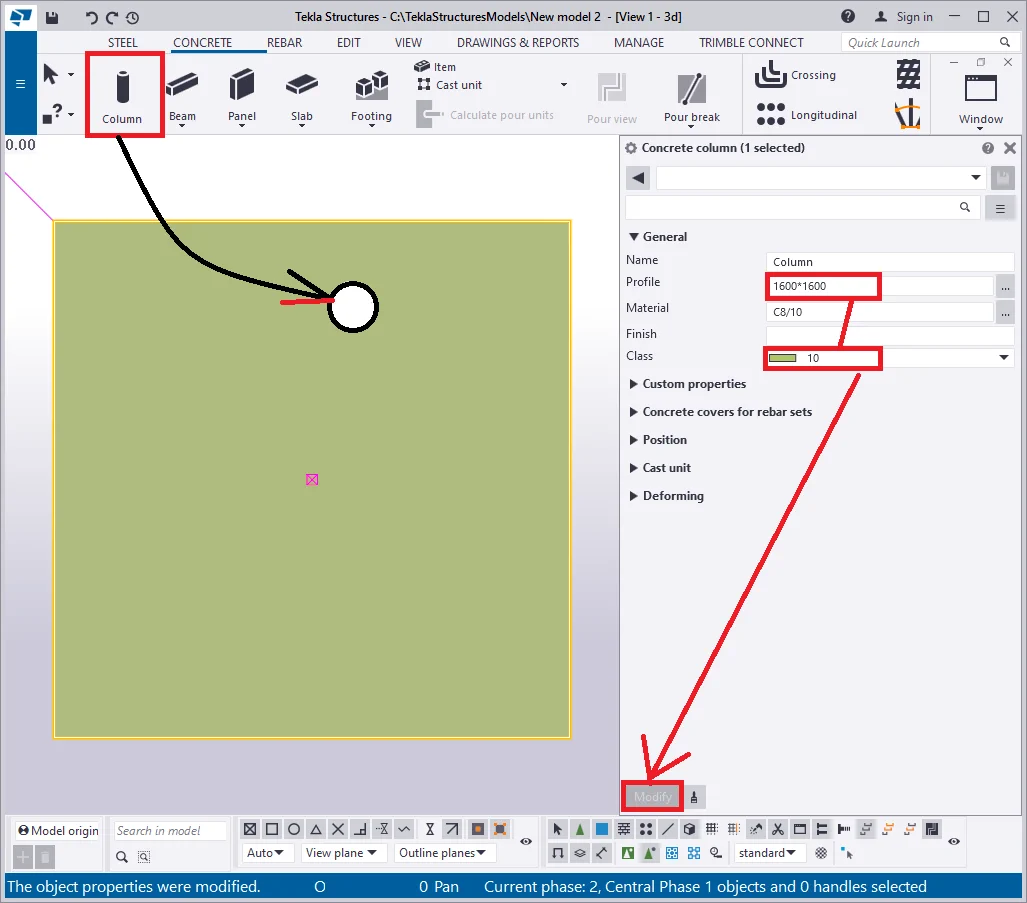
Set up the column properties according to those presented in the below
|
Profile |
Class |
Top position |
Bottom position |
|
1600*1600 |
10 |
-1500 |
-2200 |
Create one more arbitrary column at the same point as the previous one.
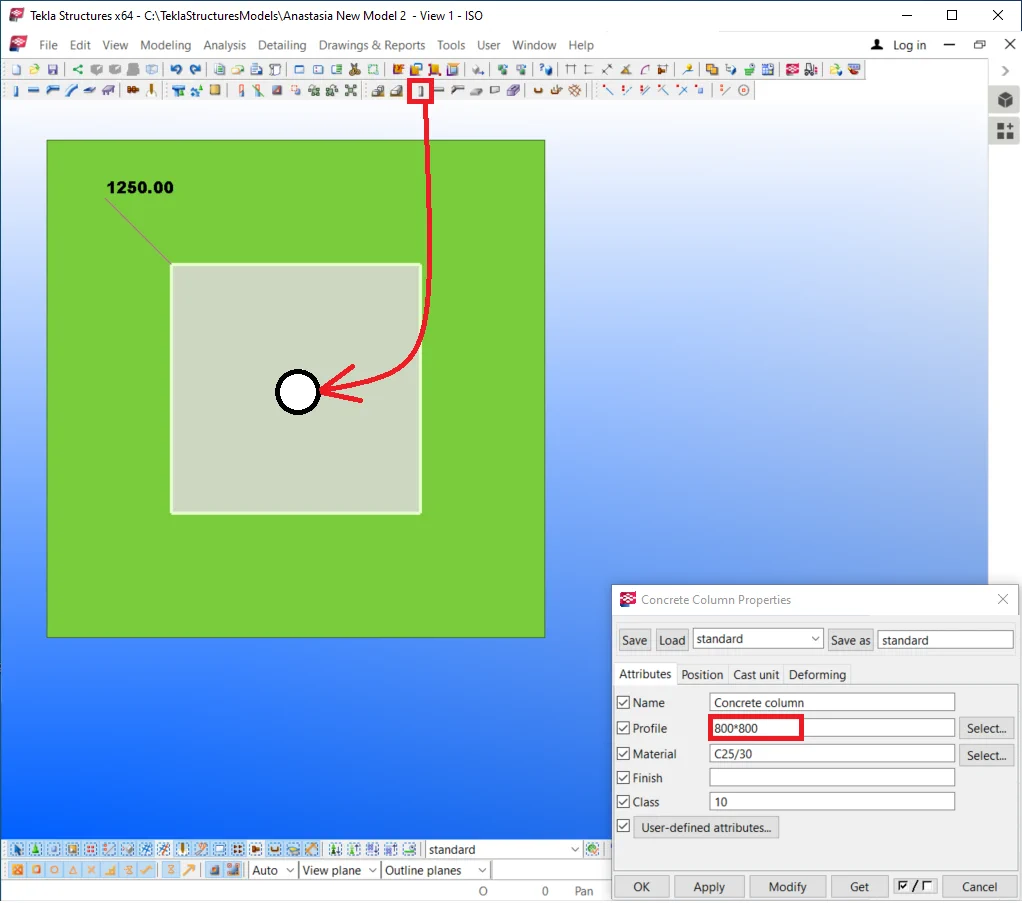
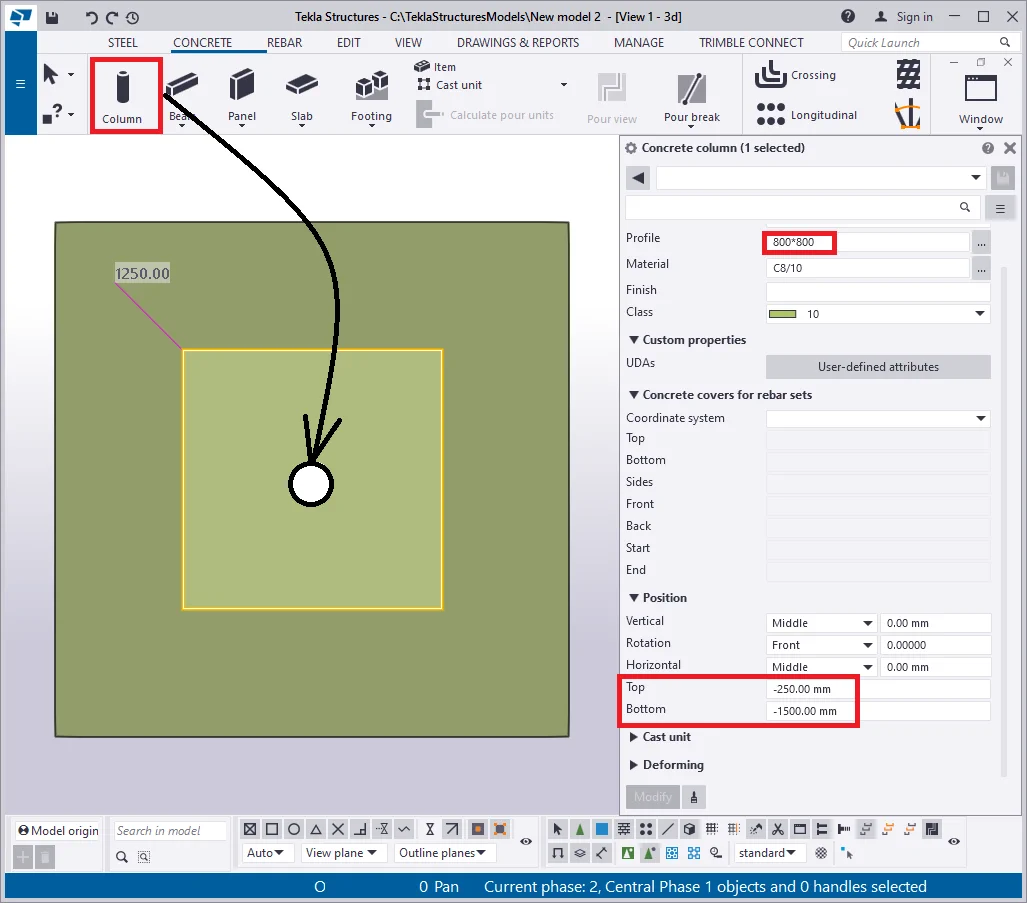
Configure the column according to the below:
|
Profile |
Class |
Top position |
Bottom position |
|
800*800 |
10 |
-250 |
-1500 |
Let’s create a third column as well.
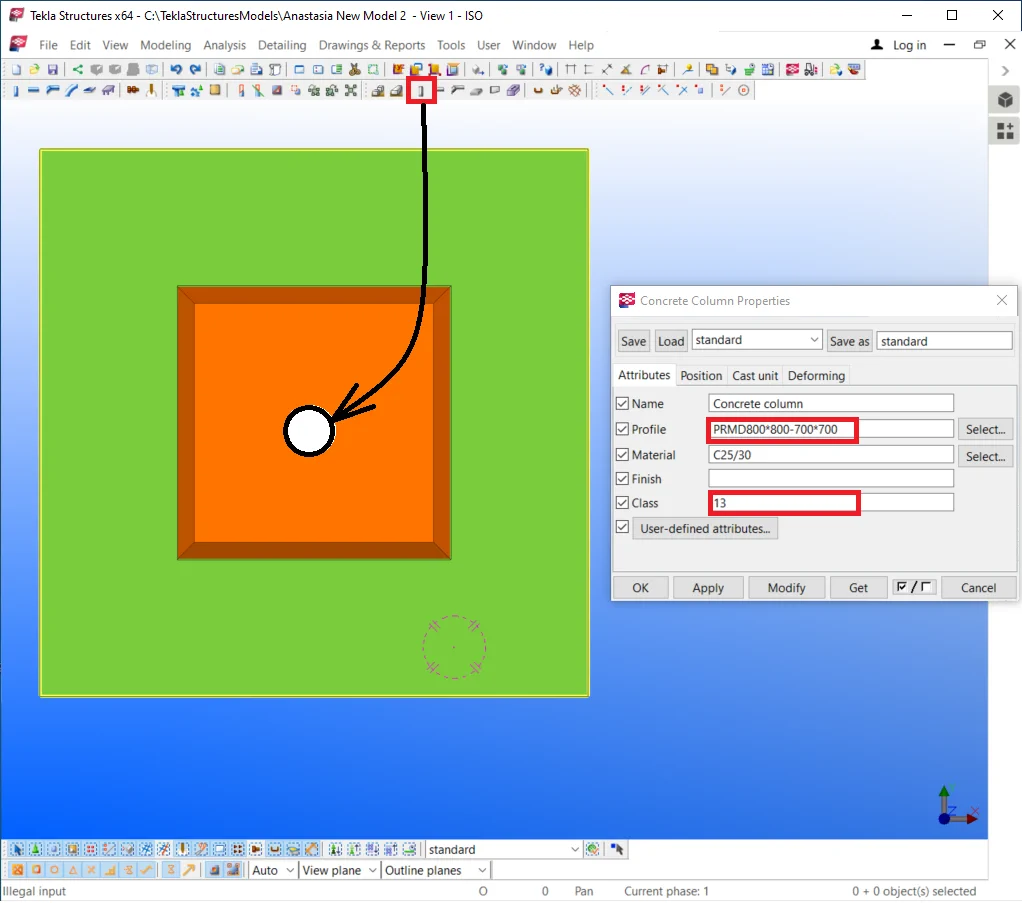
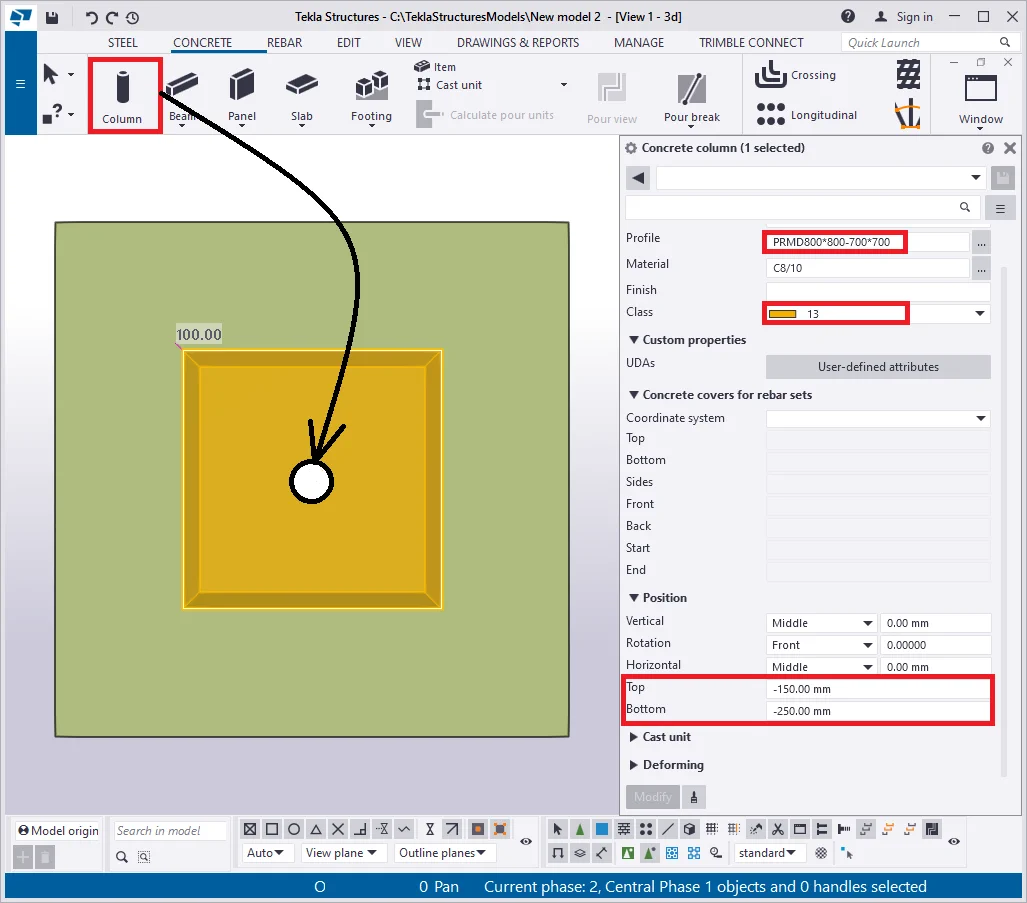
Configure the column according to the presented below:
|
Profile |
Class |
Top position |
Bottom position |
|
PRMD800*800-700*700 |
13 |
-150 |
-250 |
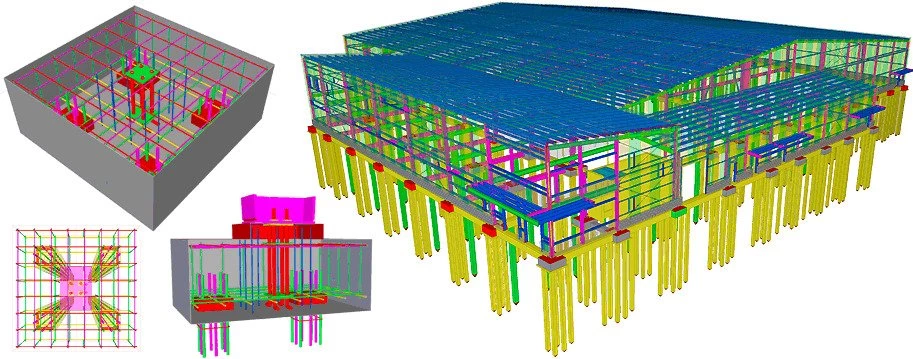
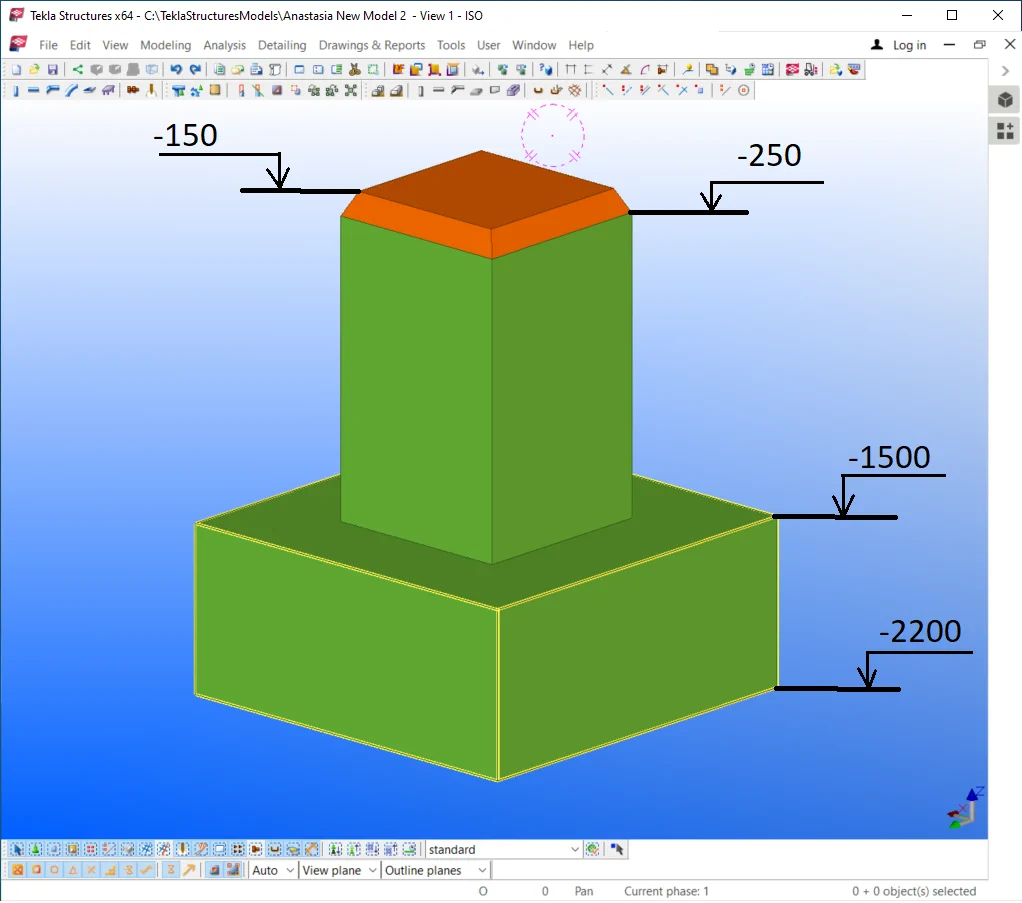
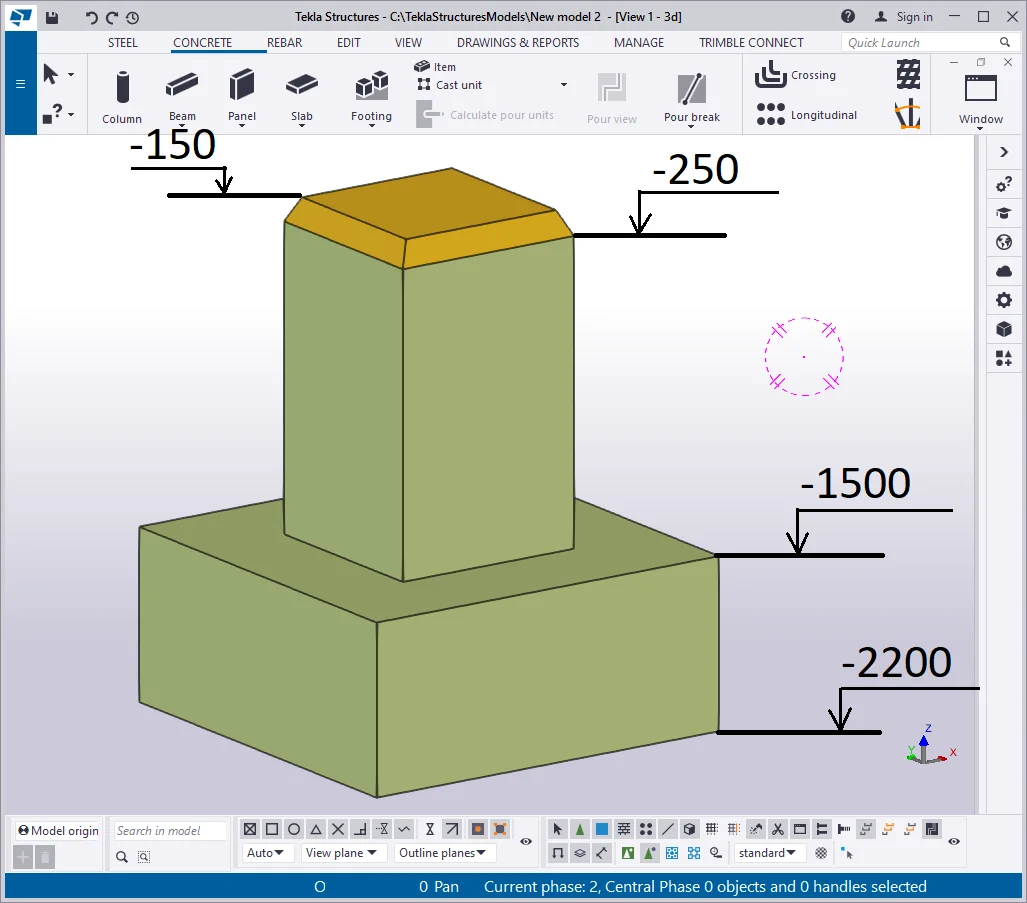
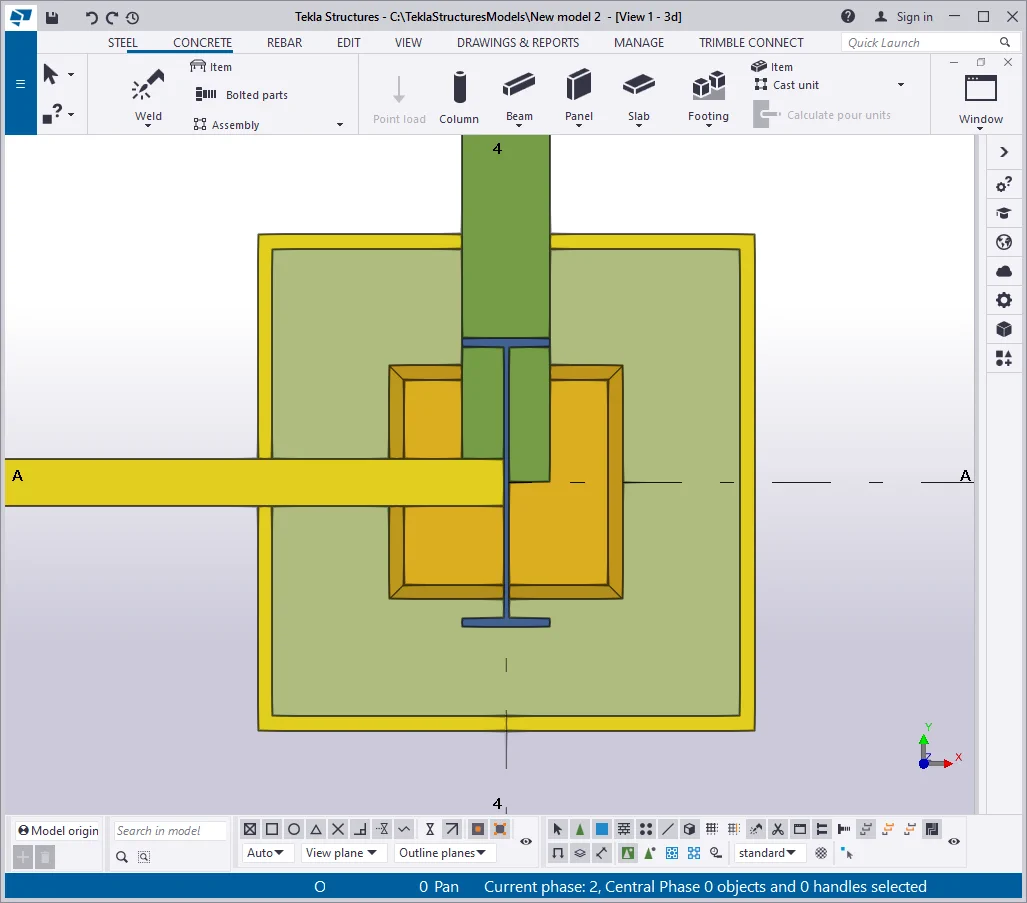
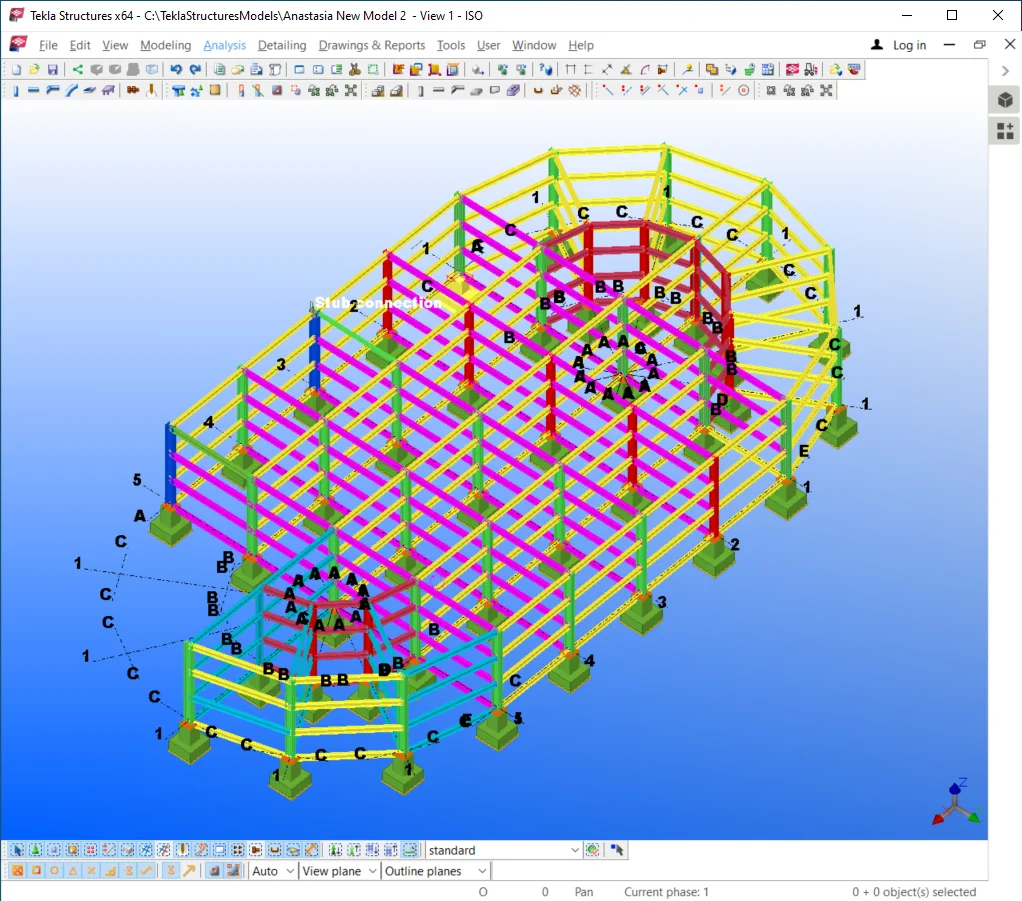
Let’s check out the resulting object in 3D.
It is important to have a clear understanding that separate foundations can be of various shapes, dimensions, and materials, depending on the multiple site factors such as loads, soil types, etc. The present example is not the only possible separate foundation configuration.
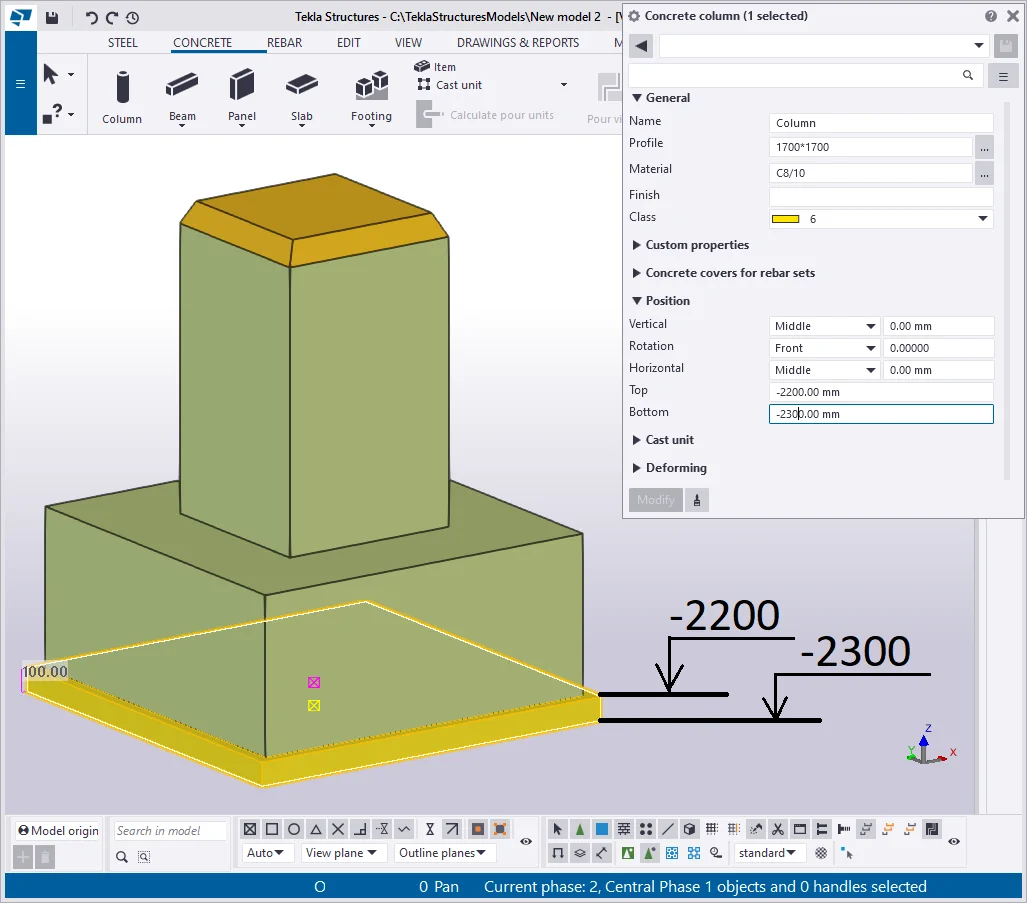
To assure a separate foundation correct shape, before mantling the surface preparation is performed. Thus concrete is poured not directly into the sand but onto a concrete setting bed. Let’s create a setting bed by using the concrete column tool. Preset the tool, according to the below:
|
Profile |
Class |
Top position |
Bottom position |
|
1700*1700 |
6 |
-2200 |
-2300 |
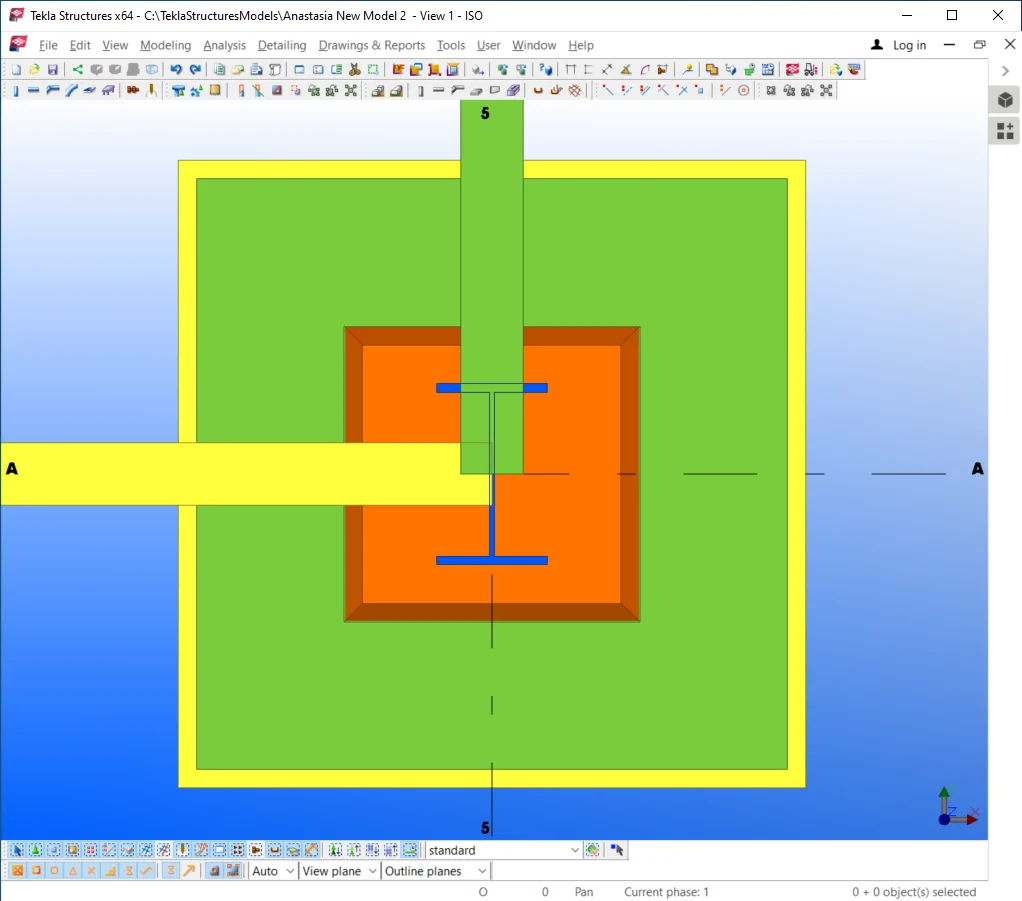
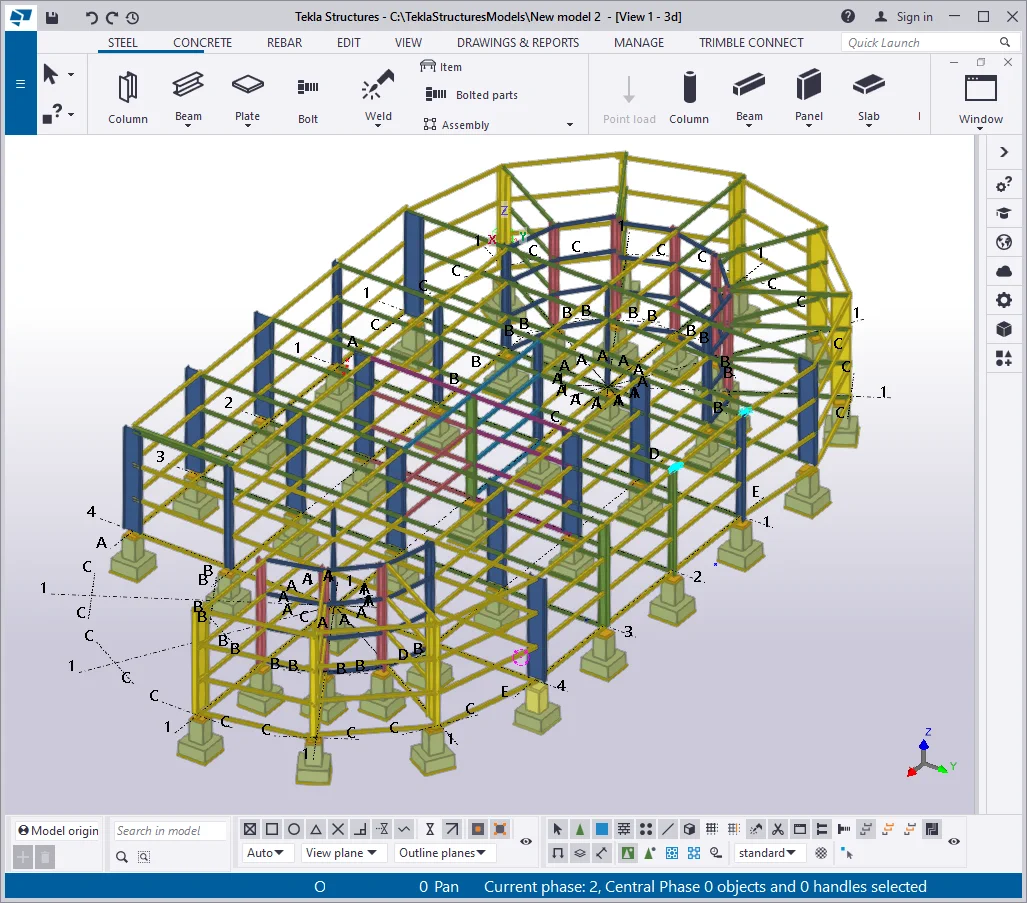
Compare your results to the below:

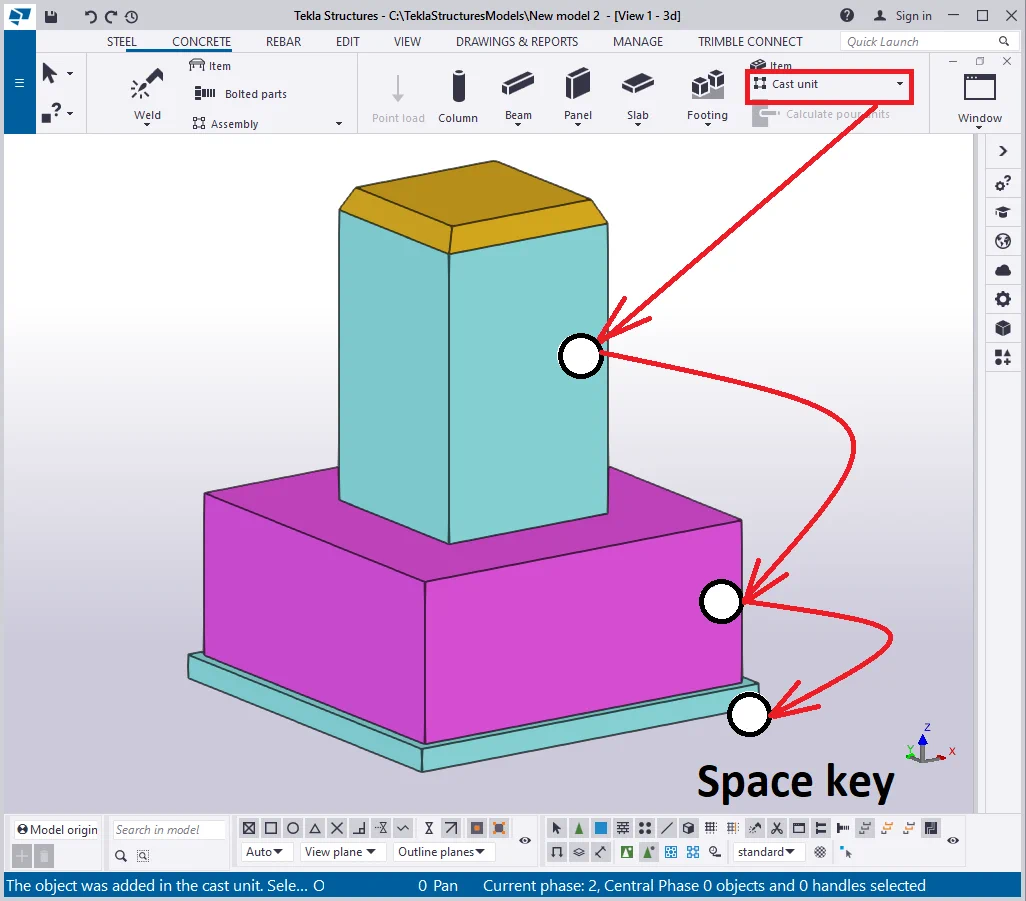
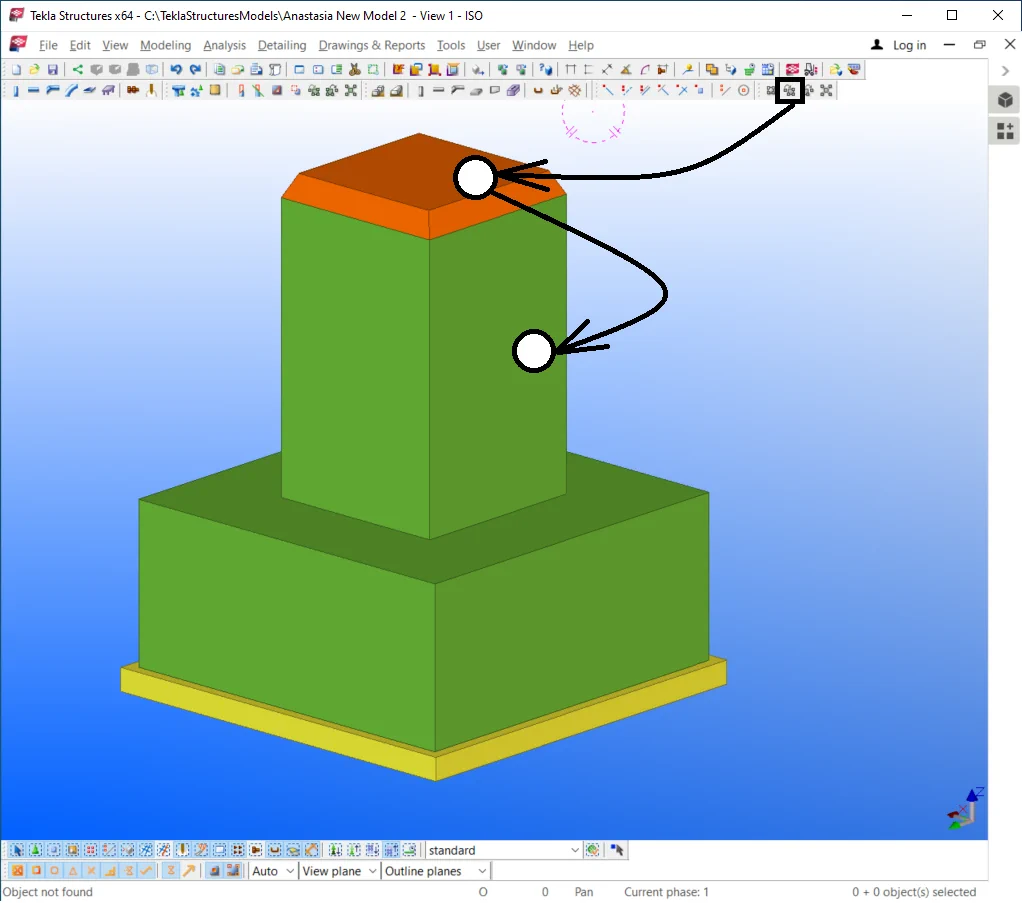
Let’s analyze the assembly sequence: pouring up the setting bed at the levels from -2300 to -2200 and forming a hard surface for the foundation, where the setting bed material differs from the foundation material, pouring up at a time the foundation body from -2200 to -250 mm, this being represented in the current model by 2 elements marked in green, which shall be united into a cast unit.
The algorithm for adding elements to a cast unit is as follows:
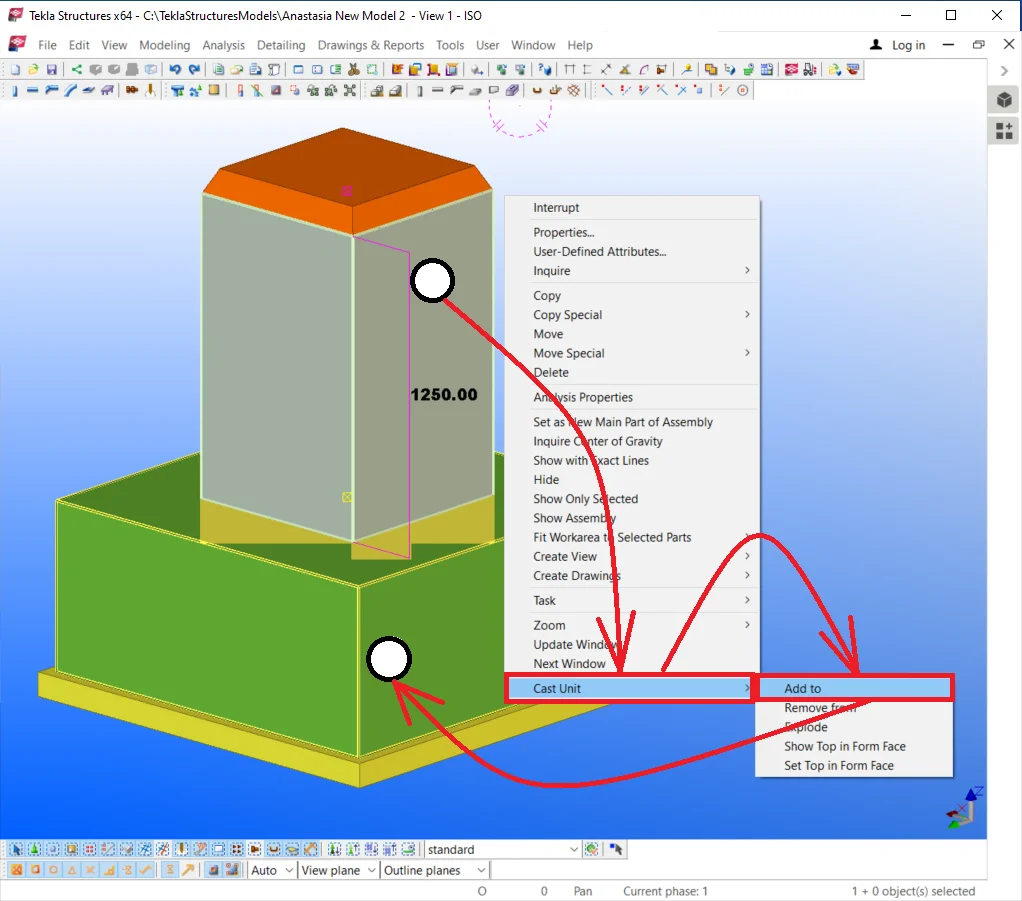
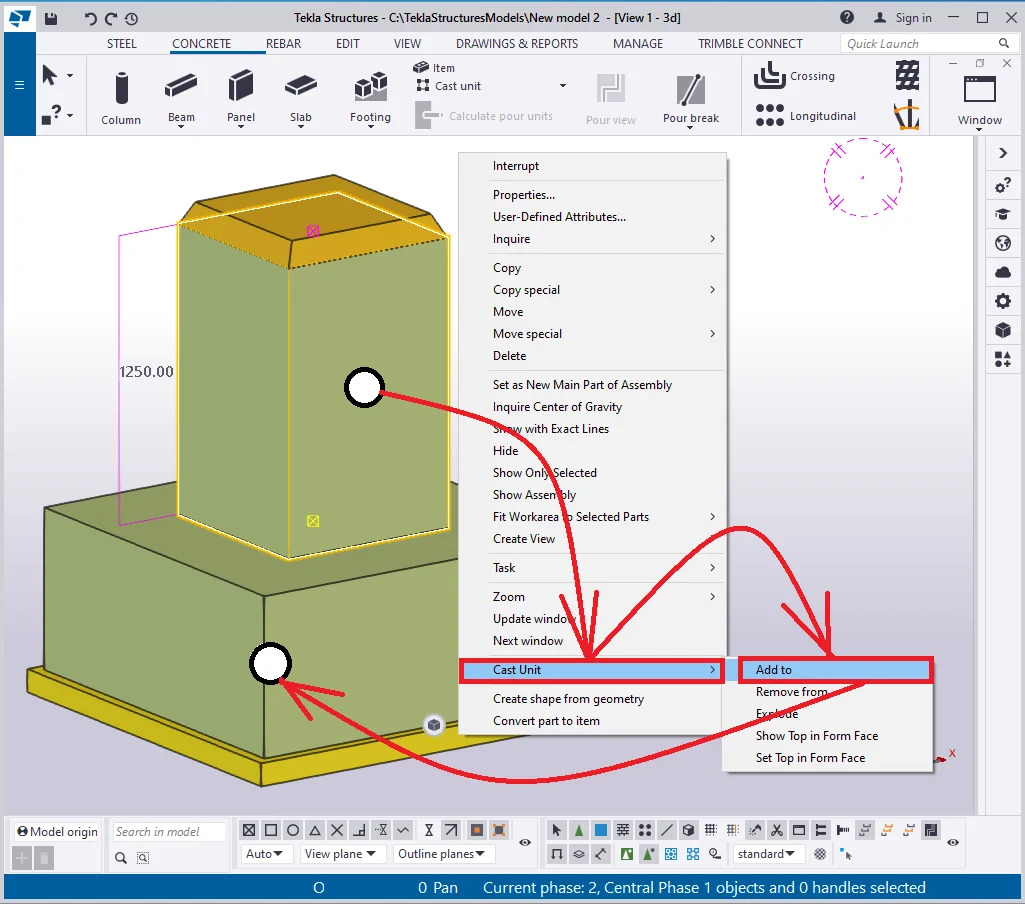
Note that visually nothing has changed, although now elements are united
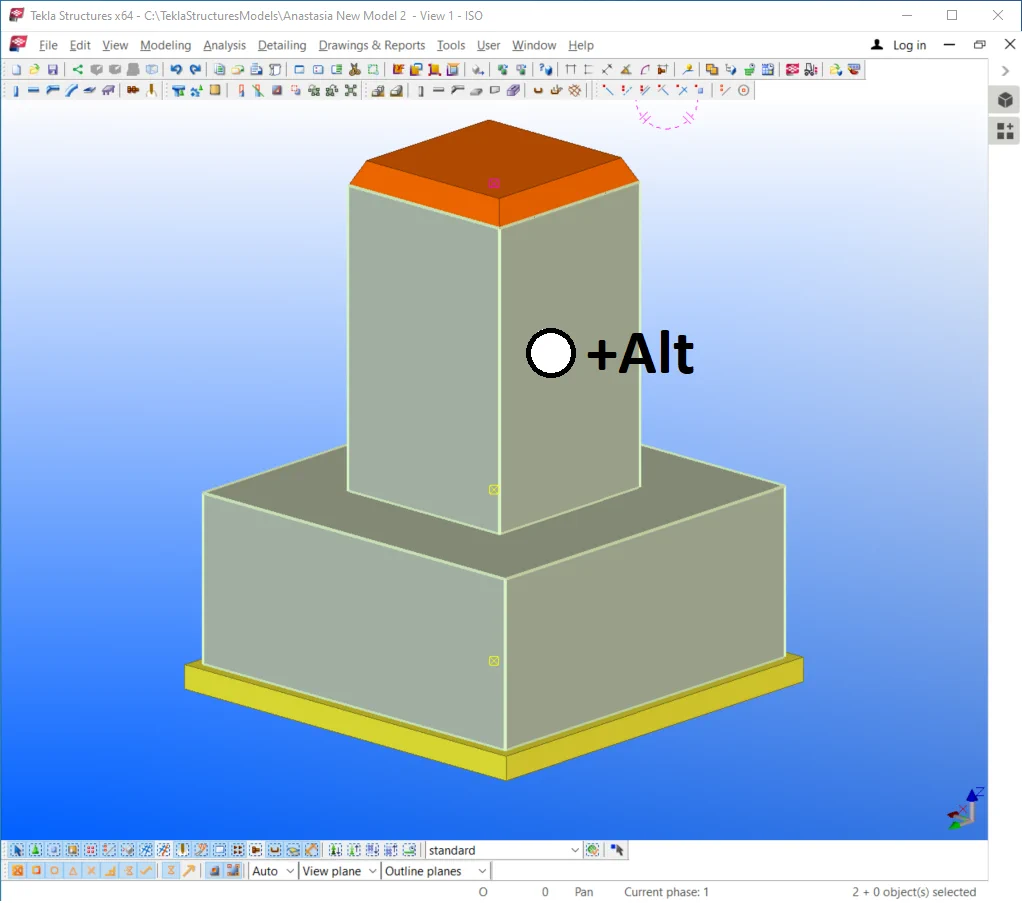
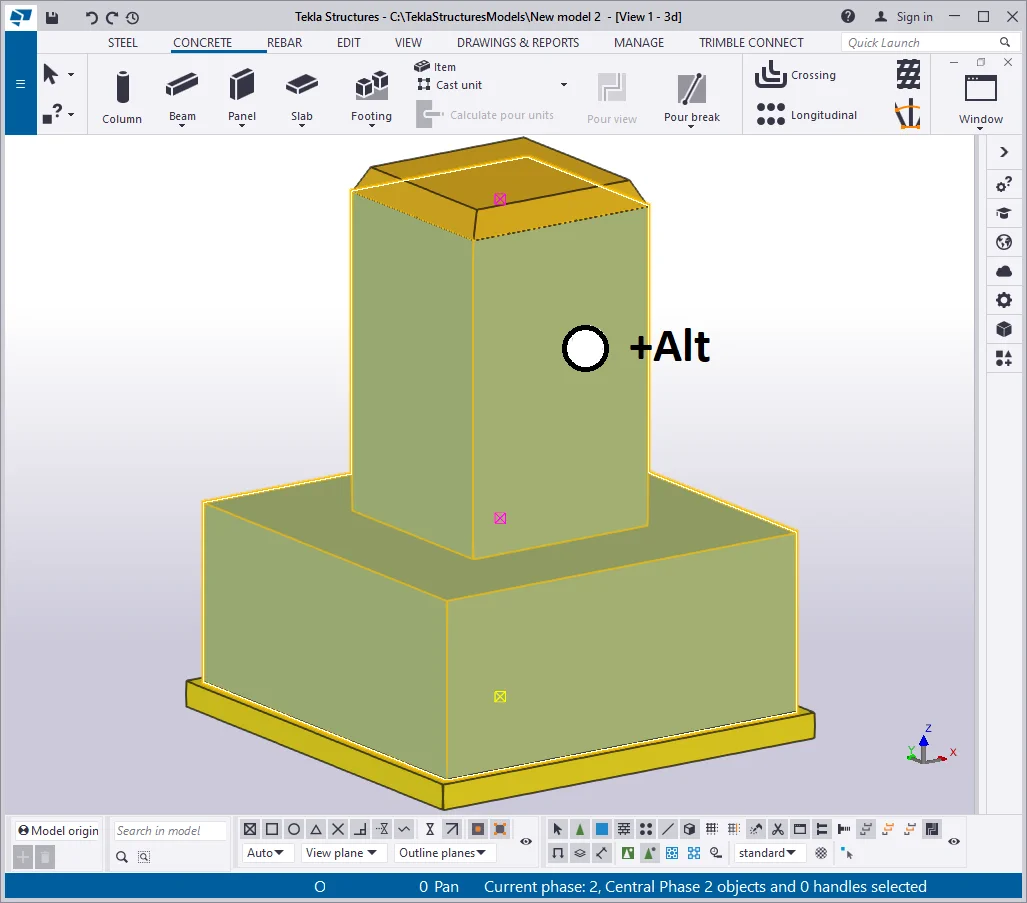
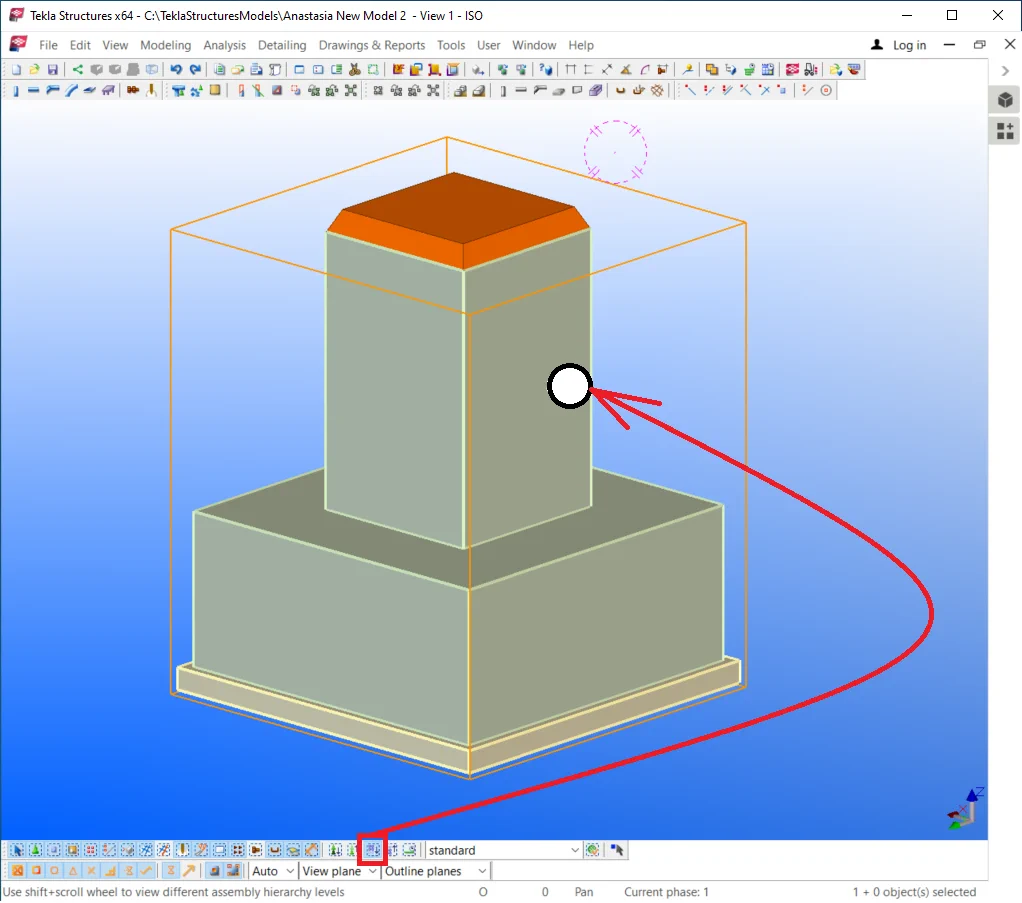
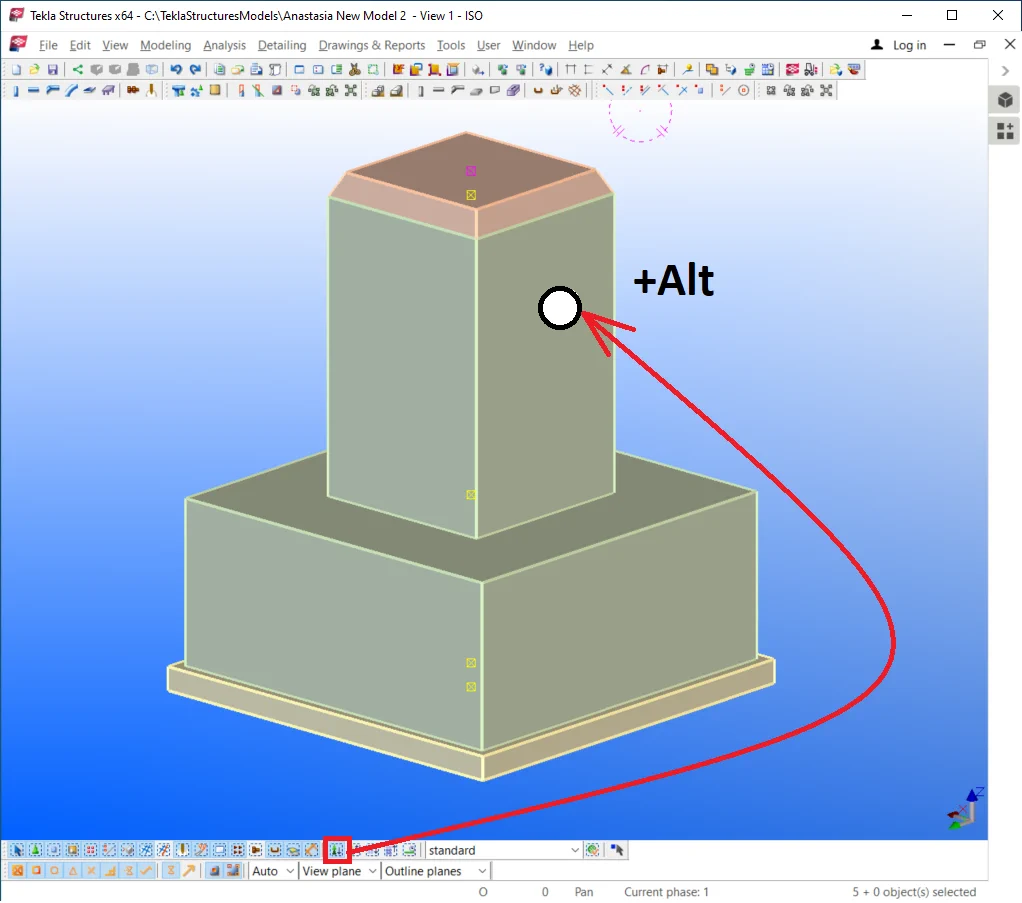
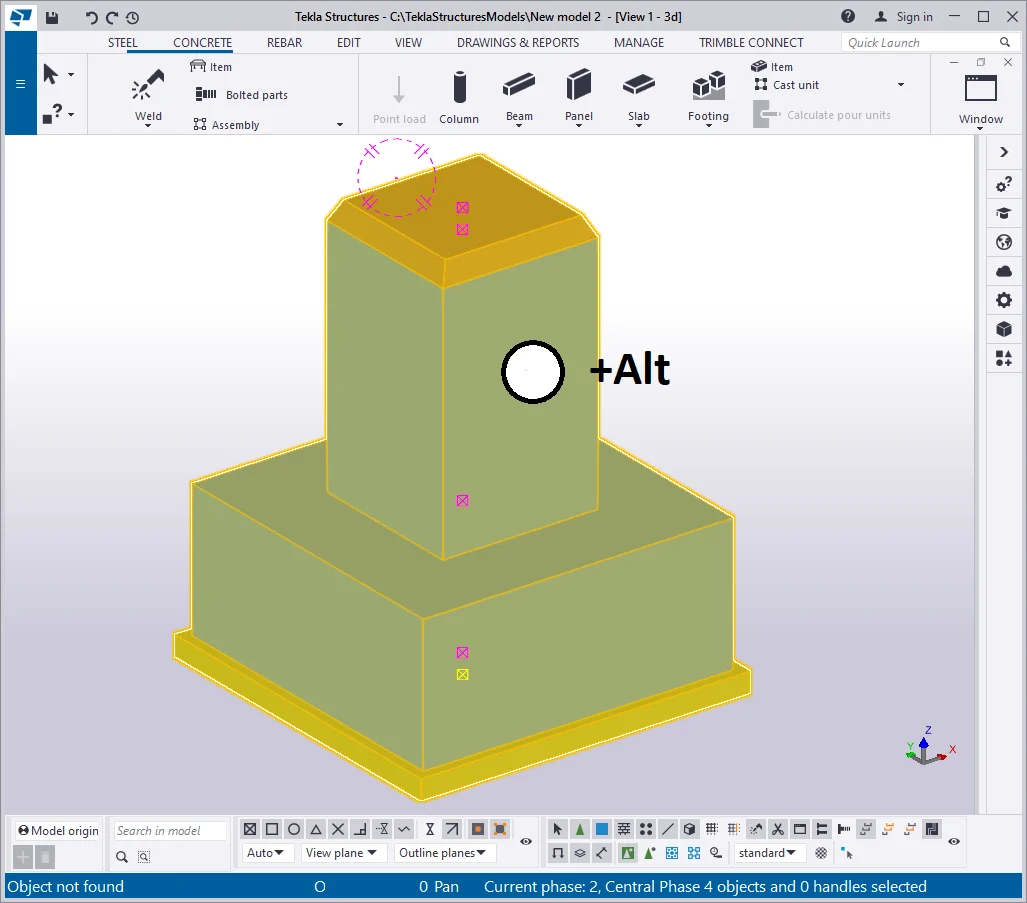
To make sure the elements are united, left-click at any of them by holding on the "Alt" button pressed, thus the whole cast unit element is selected.
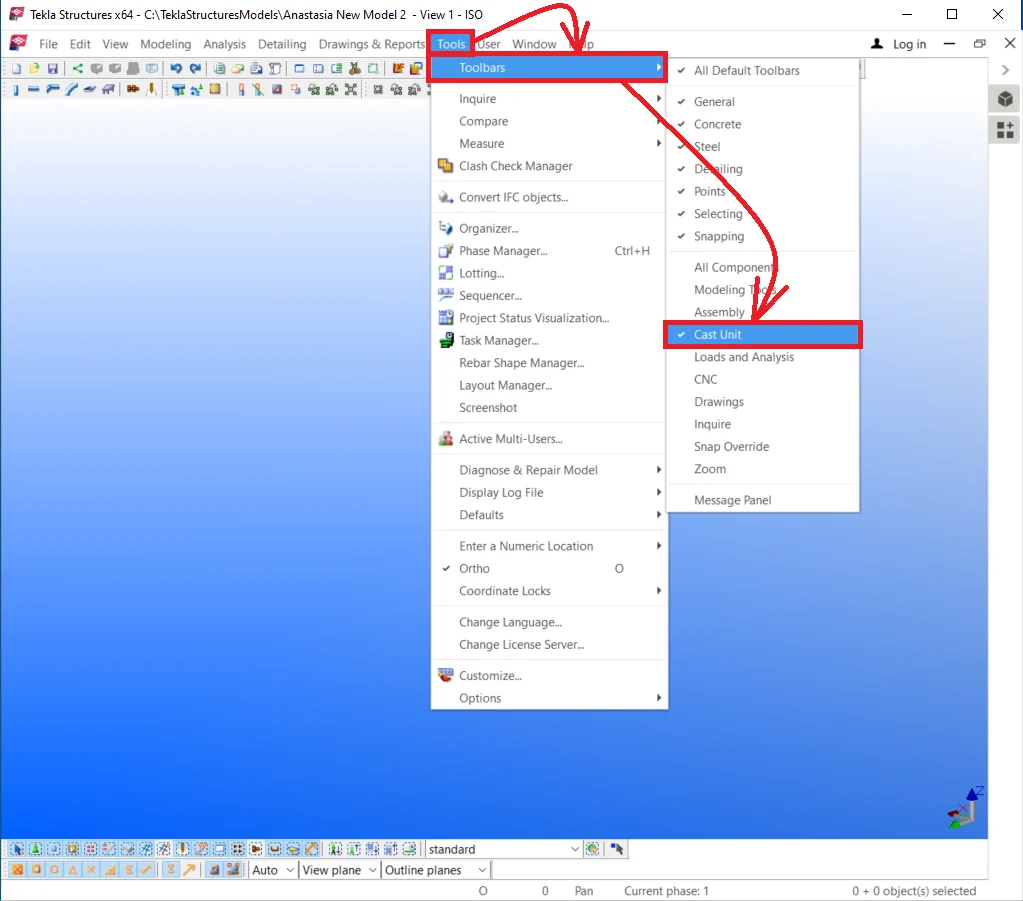
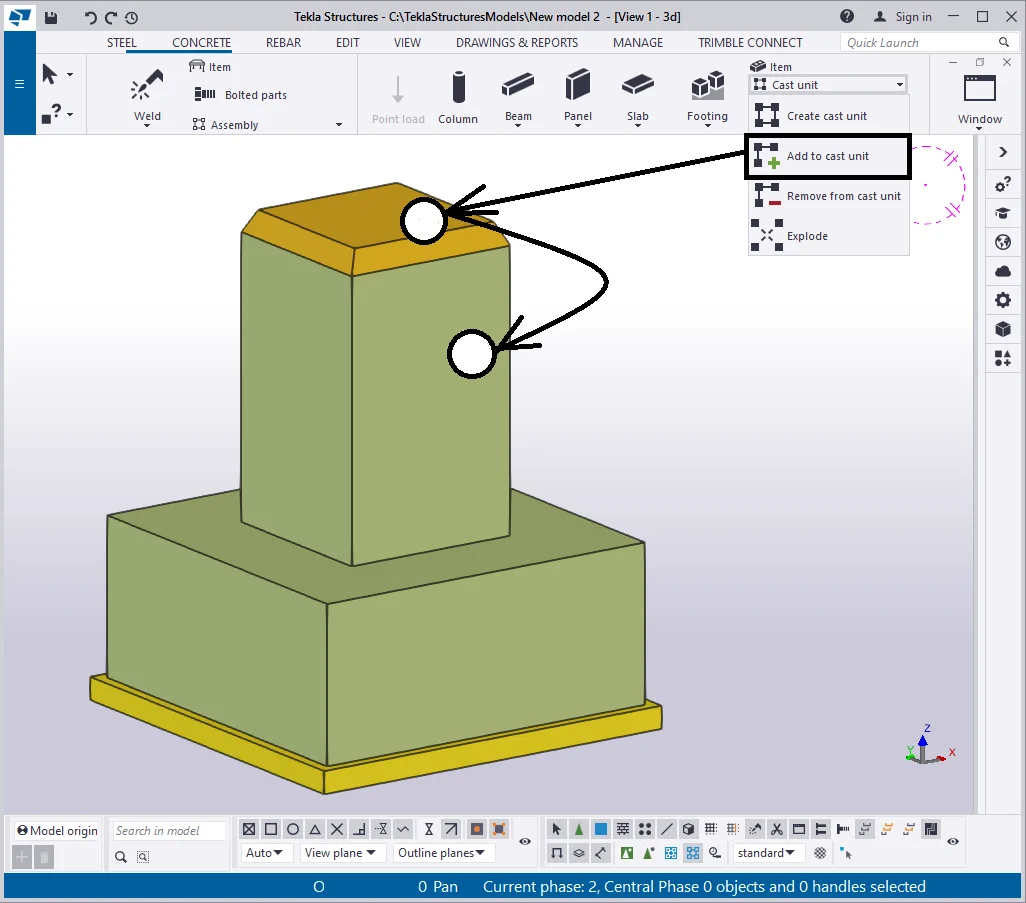
Also, the "Create cast unit" tool is available at the main menu bar, however depending on the localization package settings it can be hidden, but available for display.
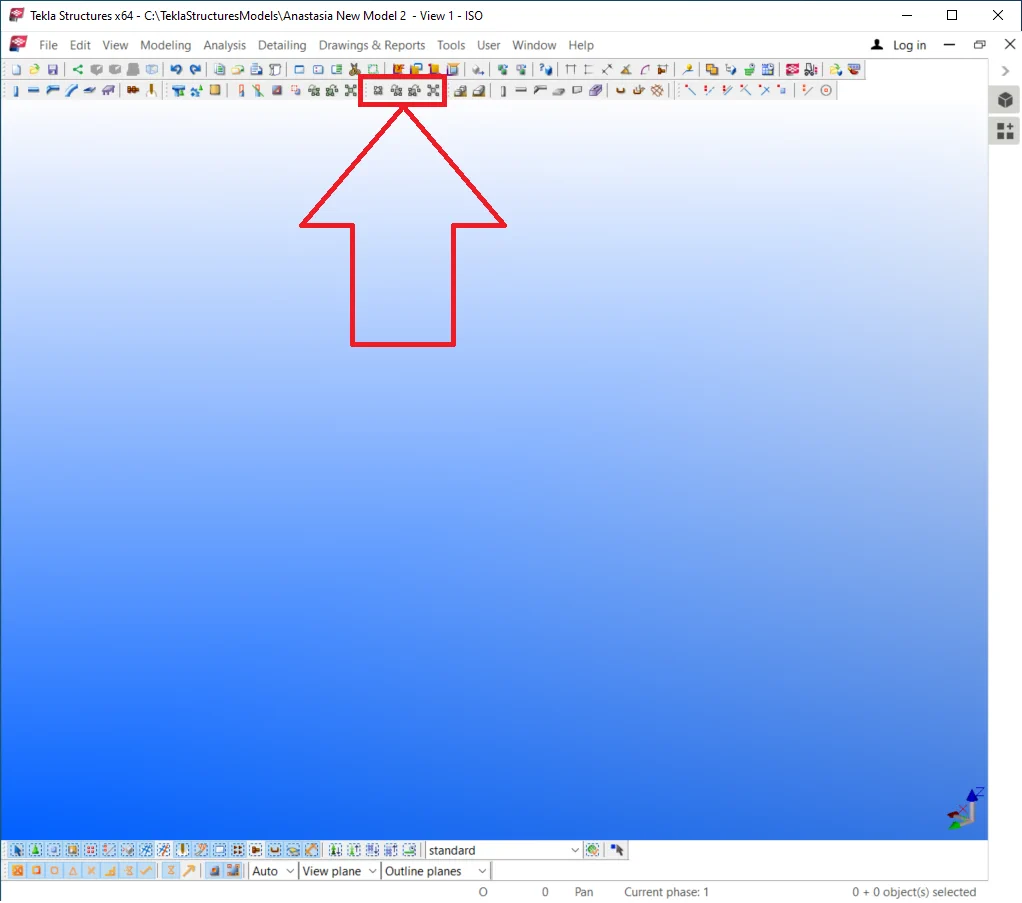
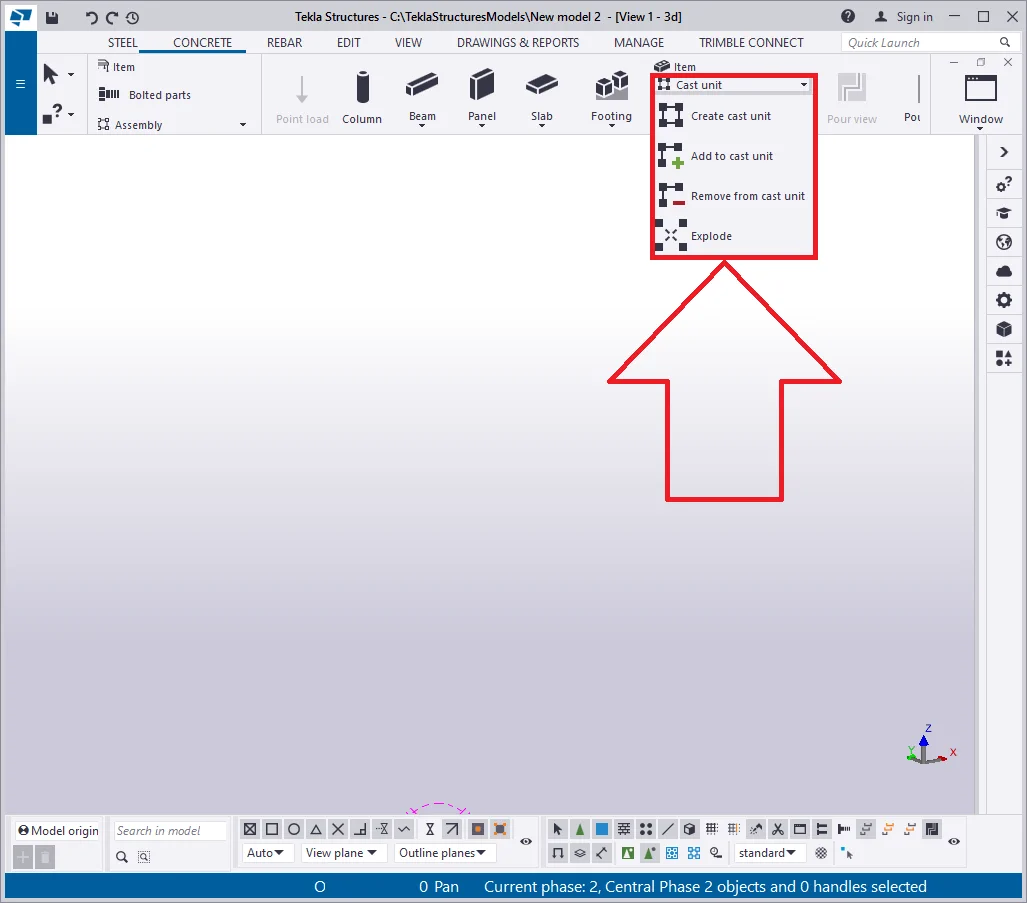
See below the algorithm for editing the ribbon.

The “Create a cast unit” tool.
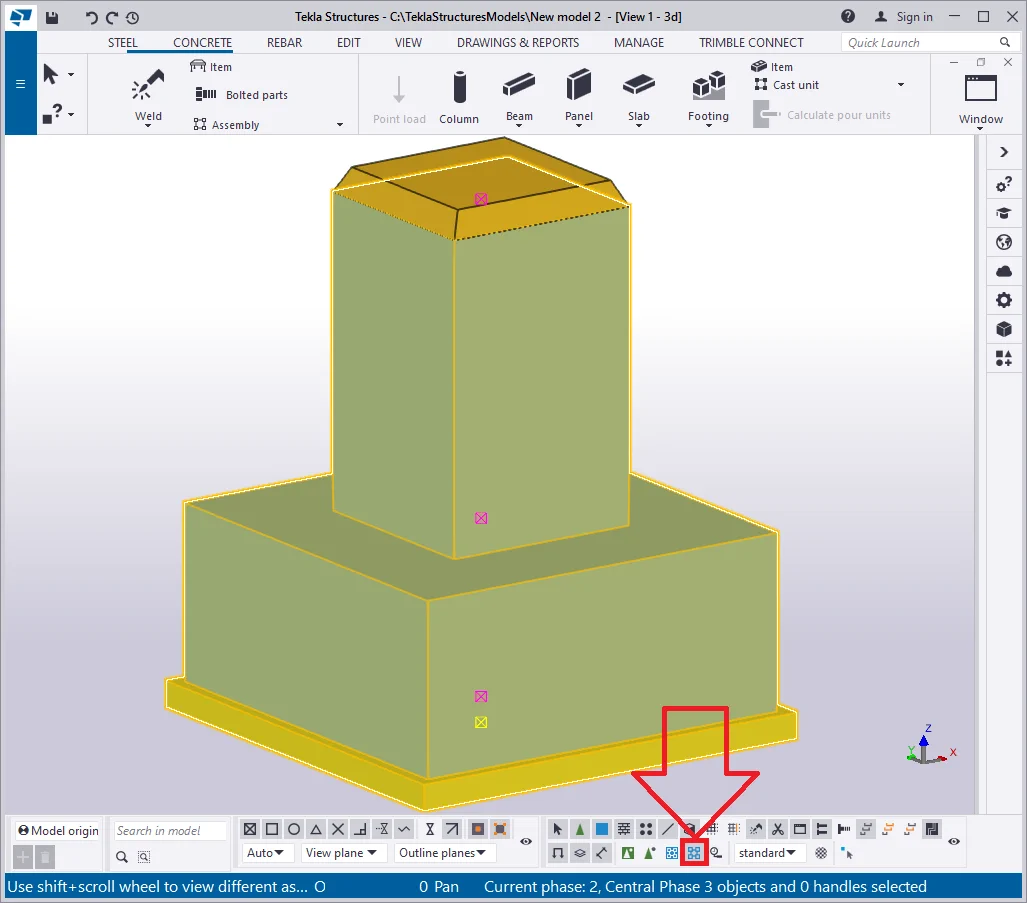
To understand the main functionality principles of the “Add to/Remove from cast unit “ tools, let’s, first of all, add one more element to the cast unit which we have already created. Enable the appropriate tool:

The main component of a cast unit is highlighted with pink color. Exactly the components prefix defines the respective of the cast unit. The other element’s prefixes are ignored analogously to the previous assemblies examined.
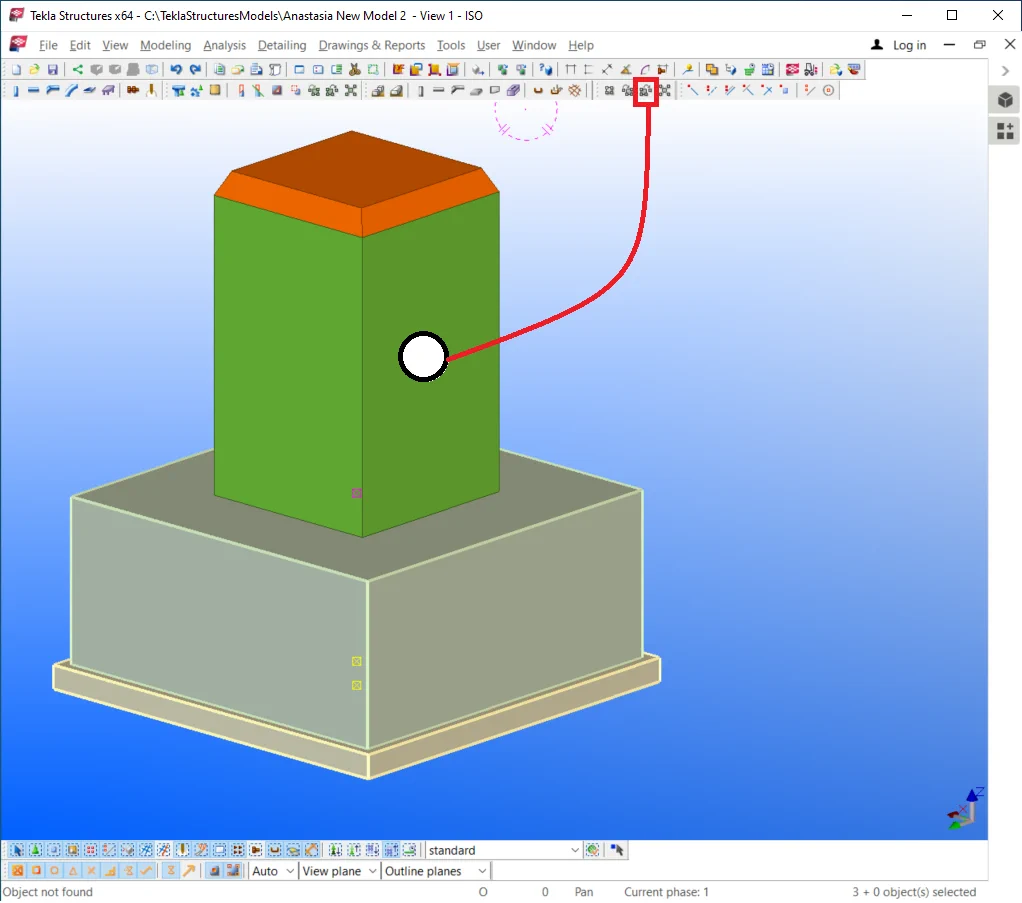
Switch on the “Select assemblies” tool and try out selecting

Enable the “Select objects in assemblies” tool and try out

Although the same objects are selected, the above are not equivalent methods of selecting cast units. Let’s conventionally agree upon using the Alt-key method as a preferable one.
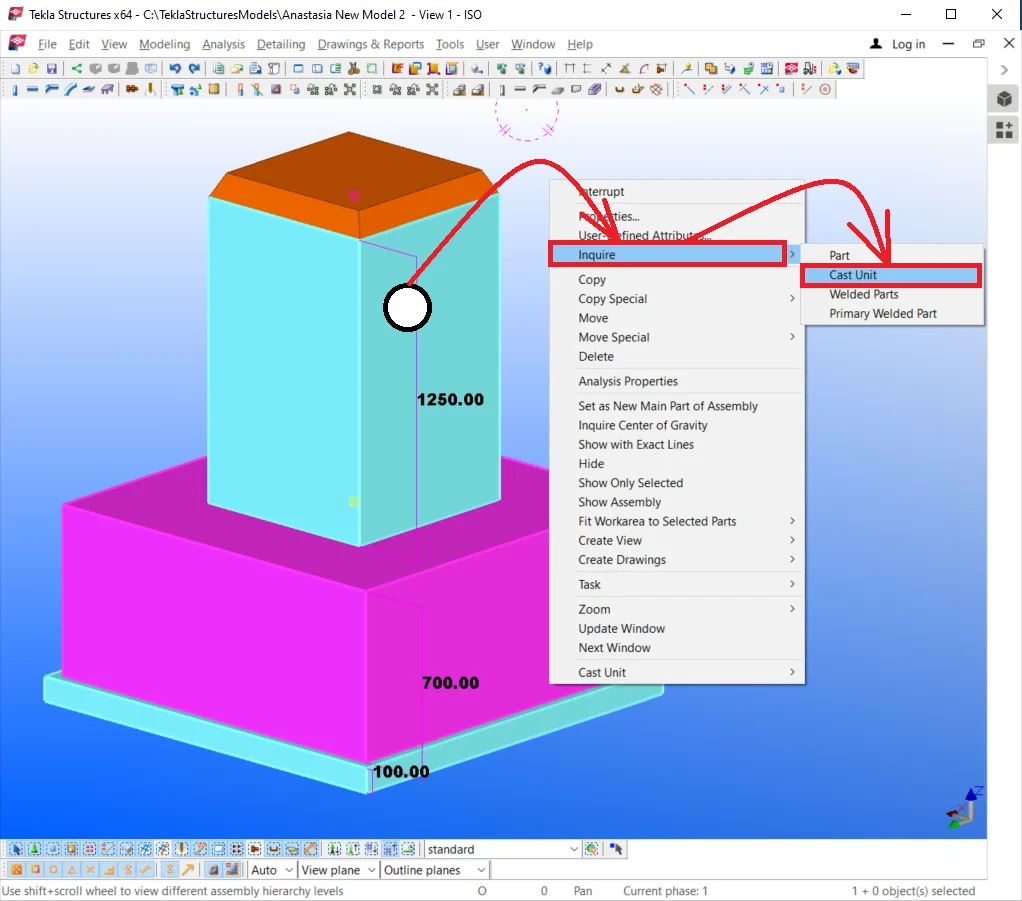
To inquire about the cast unit main component it is sufficient to
The “Remove from cast unit” tool.
A cast unit may include many components, thus a user may be required to delete any of the objects. Thus the “Remove from cast unit” tool becomes necessary.
Let's try out deleting a component according to the below algorithm
Now, when selecting the cast unit simultaneously holding the "Alt"

The “Add to cast unit” tool.
This tool works opposite to the previous one, as it allows adding an element to an already existing cast unit. Also, this tool switches the main component of the unit by substituting the selecting sequence.
Let’s add up an element to the cast unit.
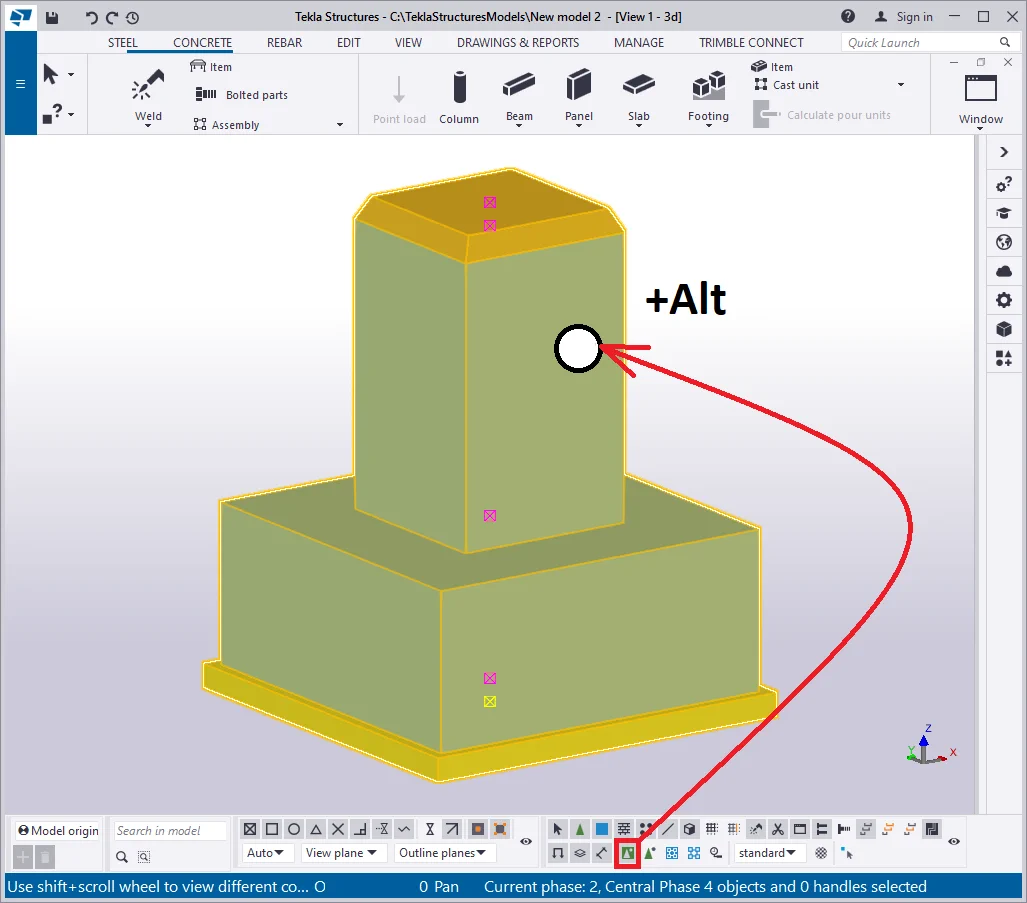
Note that TS does not require reappointing all the cast unit parts, but


Repeat the above:
Now all the parts are included in the cast unit. Check on this by clicking
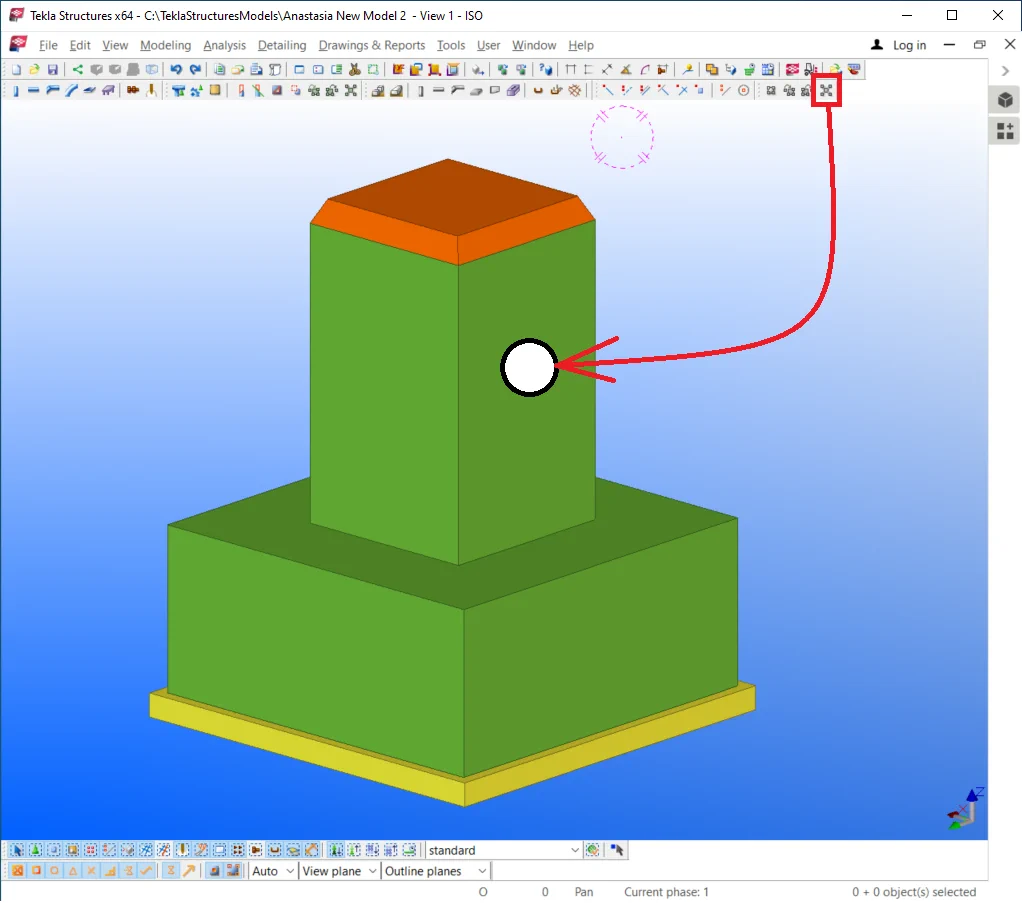
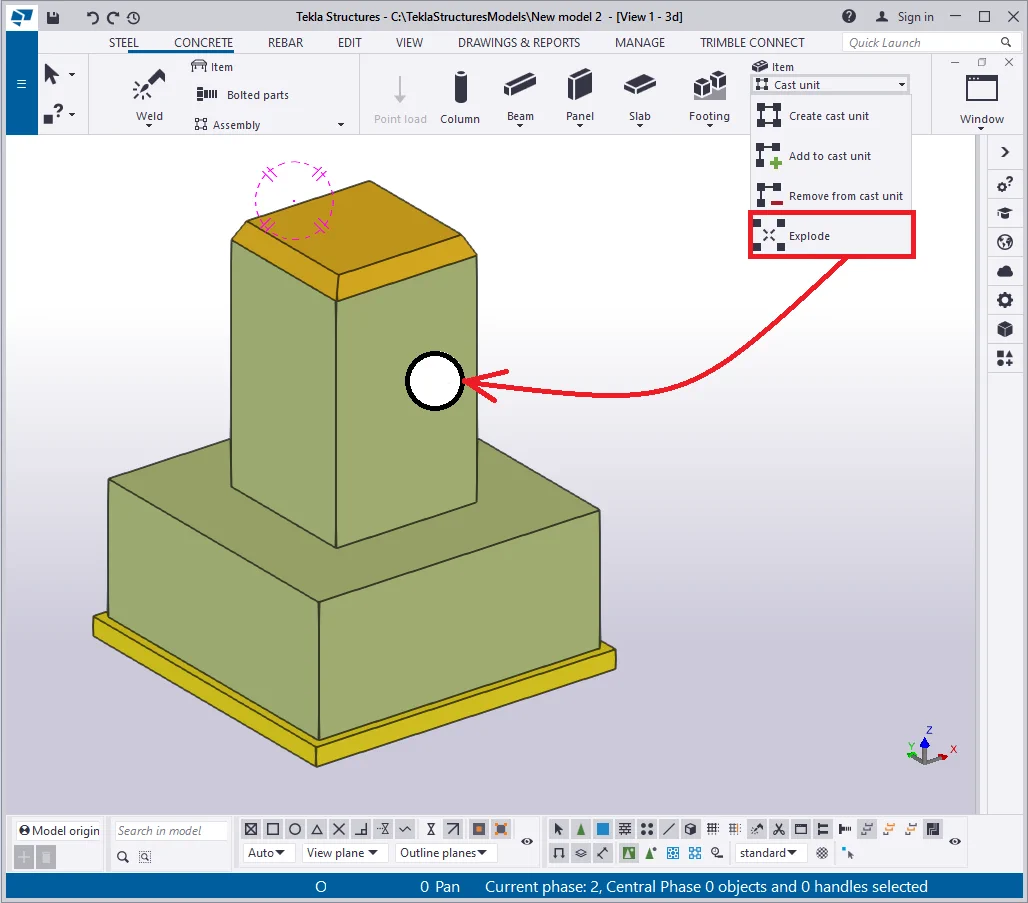
The “Explode” tool.
This tool ungroups the objects belonging to a cast unit.
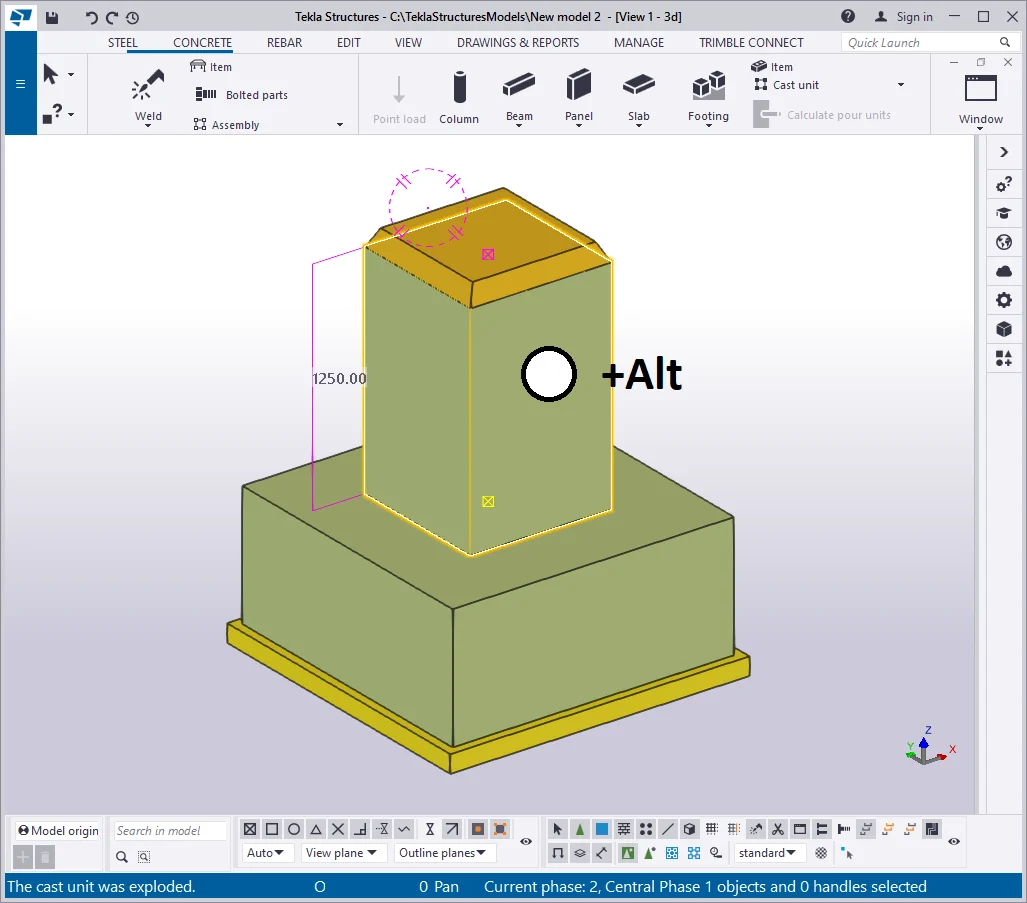
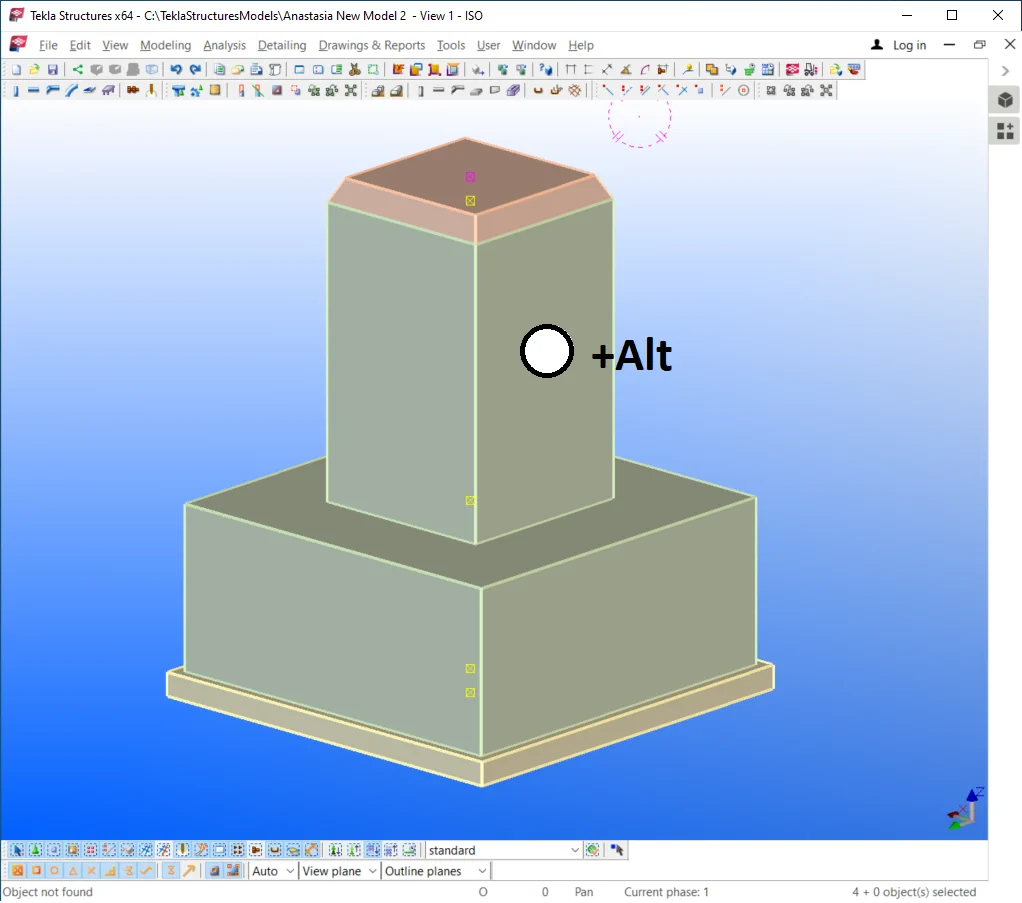
The algorithm for using this tool is as follows:
Now each element is selected separately, even if you hold on the "Alt"

Now we have examined all the “Cast unit” menu tools.
Let's unite all green parts into an assembly, as in practice, it is
Go to the view plane by enabling the Ctrl+P hotkey combination. Select the separate foundation object created, and allocate it under a column center of the test steel structure created.
Check the correctness of the executed operation. Copy the separate foundation
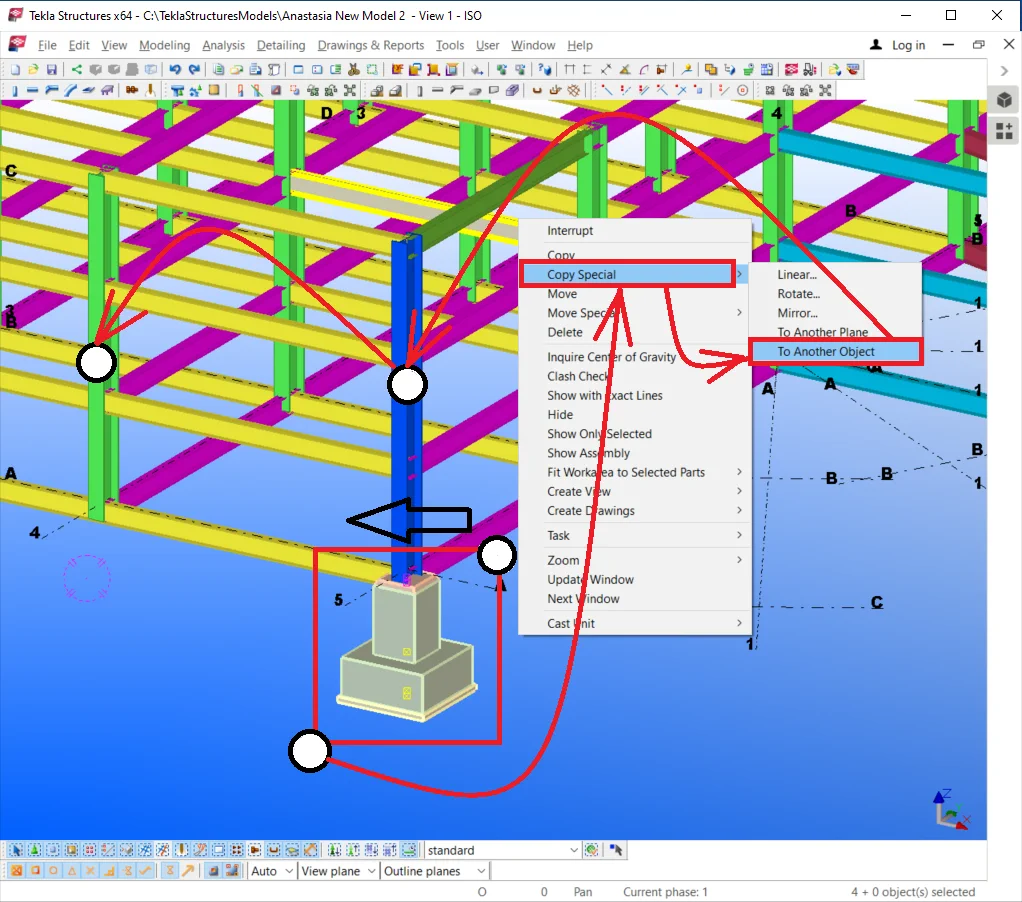

Compare our results to those presented below:
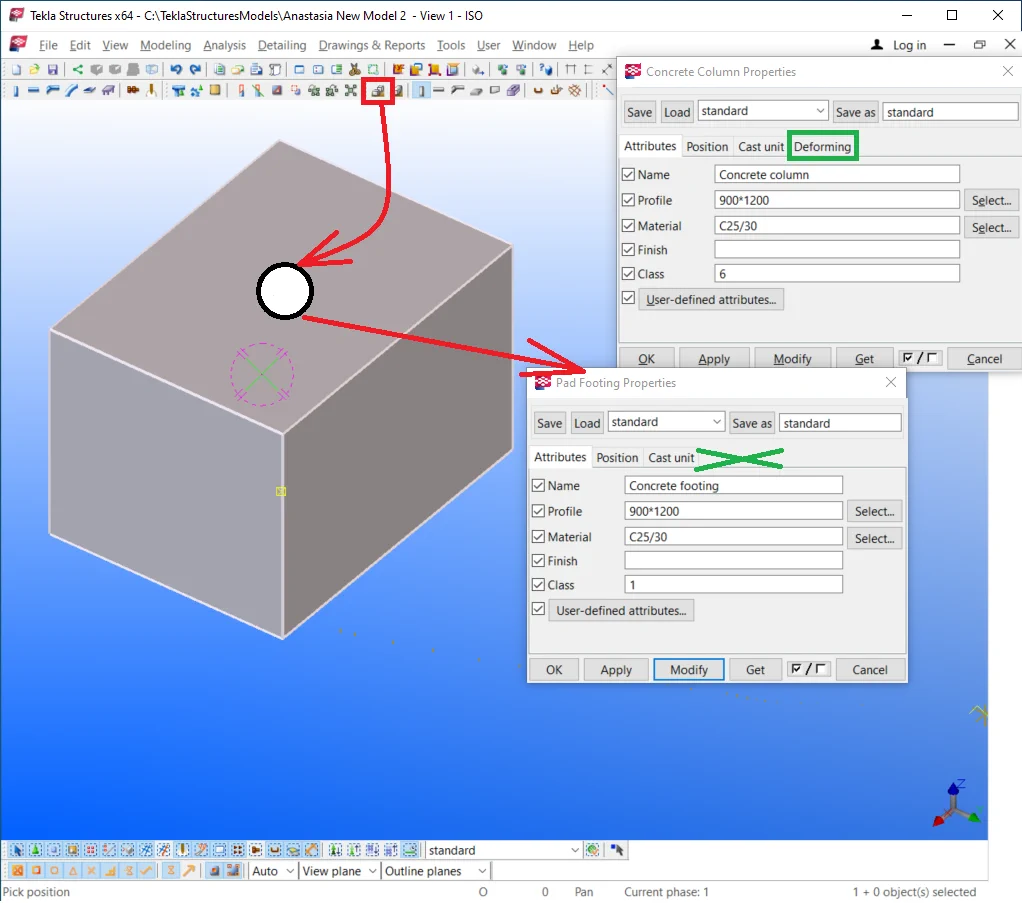
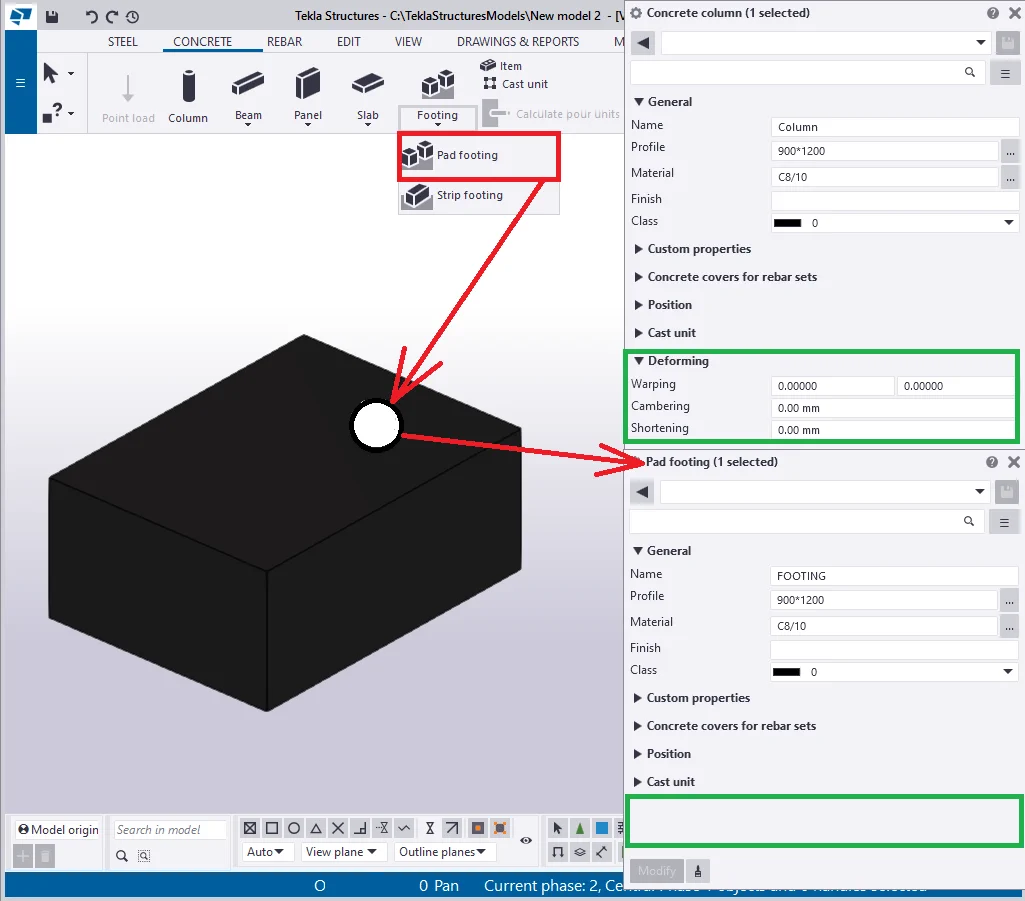
The “Concrete footing” tool is practically identical to the “Concrete column”, except for the fact there are no "Deforming" parameters applicable to it.
It is only possible to set out various profile types with no shape modifications to be configured. As there are no other differences between footings and column tool parameters list, we will not focus on considering them repeatedly.